Showing posts with label dessert. Show all posts

Wednesday, October 24, 2012

Chocolate Chip Cookies

Pin It
Classic Chocolate Chip Cookies
 
 
Hello:)! So this is just a quick post today but wanted to share this classic, go to recipe with you. I had some extra time this morning, mainly because I showed up to work WAY to early.
Yup nothing like showing up at 7:30 and you aren't supposed to be in until 12. Oh well it gave me time to take the pup for a super long walk AND make some cookies.
This recipe is actually off the back of a chocolate chip bag. No special tricks or secrets here. Just good ol' classic goodness.
I have made some many chocolate chip cookies using numerous recipe each slightly different. I was a huge fan of Alton Browns recipe from his Good Eats book. But all in all when you just want an easy go to recipe I still go to the chocolate chip bag, and I'm never let down.
So Thanks Nestle Toll House, for having such a great recipe. And thank you Pheobe Buffet for giving us a good chuckle :) Love this episode.
 
 
You can find the lovely recipe here.
Enjoy your day and don't forget to smell the roses, and eat the cookies :)
 

Saturday, October 20, 2012

Time Flies.....

Pin It
Lets Catch Up
Making Sugar*Punch Napkins at the bar :) lol
 
Hello friends! Or should I say strangers?! I will say it again....I have to be the worst blogger ever. I have so much to put up on here but have yet to get a new computer and find time to put things up. So much has been going on with Sugar*Punch and have defiantly picked up a lot of business lately and it makes me so incredibly happy! I know this is my passion and plan on Cupcake World Domination, muhahahaha!

Hahaha not quite but I wouldn't mind tackling South Jersey for the time being :).
I have had quite a few baby showers lately so I will show you how they came out.


Little Man Cupcakes Boy Baby Shower
Vanilla with Chocolate Mousse Filling and Vanilla Buttercream
 
Mango Coconut Cupcakes for Baby Boy Elephant Shower


Baby Reveal Cupcakes

It's a boy!

Another Baby Boy Shower with AMAZING
Banana Cupcakes with Marshmallow Frosting and Chocolate Ganache Drizzle
YUM!

 I also made cupcakes for a co-workers birthday. 
I am in love with these beauties:) Triple Chocolate; a dark chocolate cupcake dipped in chocolate ganache and topped with a whipped chocolate frosting. And Funfetti cupcakes; a light and airy vanilla cupcake with sprinkles folded into the batter, topped with a whipped vanilla buttercream and garnished with rainbow sprinkles.
  Last week was also a very tragic week for my family. We had to say goodbye to my wonderful grandmother, my Nanny. She was such an amazing woman and we are still in shock that she is no longer with us. Through her I learned to love animals and will always have a special place for elephants. Life will not be the same with out her and we will forever miss her!

Angel wings <3

This was a typical day with her<3 So funny to see her and her great
granddaughter going to get the mail.

Well thats just a few things to catch you up on. Check back for some awesome dinner recipes and to hear about my trip Santa Fe, NM.
Thanks so much for still following me and supporting my blog and Sugar*Punch Cupcakes.

Thursday, September 27, 2012

An apple a day....

Pin It
Apple Turnover

Hello hello! It's apple picking time! Just like all the pumpkin recipes I get super stoked about
 (cookies, cake, pie, coffee) I am just as excited for apples!

As the old saying goes, " An apple a day keeps the doctor away", I literally eat an apple almost everyday. They are just something I never get tired of and really enjoy. And apple desserts, well that's just on a different level. Apple pie, apple cake, apple muffins, apple cider donuts. mmmmm!

Well my roommate made homemade apple strudels. Last spring her and I traveled to Europe with our first stop in Switzerland. All I  talked about was wanting to get an apple strudel while there. Apparently Switzerland is known for their strudels, after their fondue of course. That being said you would assume they would have endless amounts and places to eat and purchase their famous apple strudels. WRONG.

We searched high and low and even sat down at this fancy outdoor restaurant when we saw it on the menu yet walked out because we found out it was a "deconstructed" apple strudel. Yup we were those obnoxious tourist. Oh well, we were on a mission.

Anyways we never found our strudel but we found a great way to make them at home!
These are light and flaky and super warm with all that cinnamon and nutmeg. Perfect little treat for fall.


Apple Strudel
Makes 6 individual strudels

Ingredients

  • 1 egg
  • 1 tbsp. water
  • 2 tbsp butter
  • 3 tbsp. granulated sugar
  • 1 tbsp. all-purpose flour
  • 1/2 tsp. ground cinnamon
  • 1/8 tsp nutmeg
  • 3 large Granny Smith apples, peeled, cored and diced into small cubes
  • 1/2 of a 17.3-ounce package Puff Pastry Sheets (1 sheet), thawed
  • Confectioners' sugar

Directions:

  1. Heat the oven to 375°F and line a baking dish with parchment paper to ensure pastries will not stick.
  2. Beat the egg and water in a small bowl with a fork.
  3. Stir the granulated sugar, flour, cinnamon and nutmeg in a medium bowl. Add the apples and toss thoroughly to coat.
  4. Heat a medium pan with the 2 tablespoons of butter and add the apple mixture. Saute on high until mixture begins to bubble then reduce the heat and simmer for an additional 5-10 minutes, until apples have softened, but are not mushy.
  5. Sprinkle flour on the work surface and unfold the pastry sheet on the work surface.
  6. Cut Pastry into 6 rectangles ( 1 large cut down the middle and 2 cuts going across). Then Place each piece onto the baking dish with at least 1inch to separate.
  7. Divide the apple mixture amongst the pastries, placing in the center of each and leaving room to seal the top pastry.
  8. Repeat the cutting of 6 rectangles with another piece of the puff pastry dough.
  9. Place each piece on top of the pieces already filled with the apple mixture and gently press the the pastry around the apple mixture.
  10. Press the edges of the bottom pastry into the top pastry and ensure they are sealed.
  11. *You can use a fork to seal the edges or cut larger rectangles and roll your strudel.*
  12. Brush the pastry with the egg mixture. Cut several slits in the top of the pastry.
  13. Bake for 35 minutes or until the pastry is golden brown. Let the pastry cool on the baking sheet on a wire rack for 20 minutes.
  14. Or serve warm with vanilla ice cream!

Friday, September 21, 2012

"Pumped" for Fall

Pin It
Iced Pumpkin Cookies
 
 
Hello hello! This weekend marks the official start of fall. Where the heck did summer go?! I know it's so cliche to say feel like it just flew by this year, even though we say that every year. BUT I really feel like this summer literally flew by! Regardless I am ready and excited for all things falls. Starting with PUMPKINS!
 
I got a few little pumpkins as soon as they were ready at the farm. They are on my steps and with this beautiful fall weather we have been having the past few weeks, they fit right in. So I thought I would make something with pumpkin. I have a few recipes I still have to post but wanted to kick start autumn with this fabulous cookie recipe.
 
These are easy peasy and taste just a sweet little ball of fall. The cinnamon and nutmeg add such warmth and the sweetness of the pumpkin and vanilla icing make the perfect cookie for this time of year.
 
They couldn't be simpler and with just a few ingredients you get this light airy but slightly sweet cookie that is hard to eat just one. So go grab your pumpkin spice latte and get back and make these pumpkin cookies :)


Iced Pumpkin Cookies
makes 24-26 cookies
 
Ingredients
 
Cookies
  • 2 1/2 cups all-purpose flour
  • 1 tsp. baking powder
  • 1 tsp. baking soda
  • 2 1/2 tsp. ground cinnamon
  • 1/2 tsp. ground nutmeg
  • 1/2 tsp. salt
  • 1/2 cup (1 stick) butter, softened
  • 1 1/2 cups sugar- I only used 1 cup and they came out perfect
  • 1 cup canned pumpkin puree
  • 1 egg
  • 1 tsp. vanilla extract
Glaze
  • 2 cups confectioners' sugar
  • 3 Tbsp milk
  • 1 Tbsp melted butter
  • 1 tsp. vanilla extract
Directions 
  1. Preheat oven to 350 degrees.
  2. Whisk together the flour, baking powder, baking soda, cinnamon, nutmeg, cloves, and salt.
  3. In a separate bowl, cream together butter and sugar until light and fluffy.
  4. To the butter mixture add the pumpkin, followed by the egg and vanilla.
  5. Slowly add the flour to the mixture, and beat until just combined.
  6. Drop tablespoonfuls of dough onto a cookie sheet and press down to flatten slightly
  7. Bake 15-20 (usually about 15) and remove to chill on a wire wrack.
  8. While cookies cool combine glaze ingredients, adding more milk to achieve desired consistency. It should be smooth and thin enough to drizzle over cooled cookies.
 
ENJOY <3


Sunday, September 9, 2012

Another Year Older.....

Pin It
White Chocolate Cheesecake
with Salted Caramel Sauce


Well I have to say I must be the worst blogger around! I have been barely posting for months now,
 :(. I really don't blame myself though. I blame technology and the death of my lap top. I have been busy yes, but not too busy to blog. It is just hard to get to a computer all the time.
I have also been super busy trying to get my cupcake business more known in the area. It seems babies are all around me so I have been doing a few baby showers and I have a few festivals coming up since we are approaching the fall season. Festivals are such a great way to get my name out there. Everyone loves having a treat walking around the festival and even if they don't its a great place to hand out LOTS of business cards. So wish me luck this season, I am super determined to expand Sugar*Punch Cupcakes and I am dead set on one day having a Cupcake Truck. Dreams do come true and I believe mine will :)!

Anyways I have LOTS of recipes to catch you up on.

 I recently celebrated another birthday which was just wonderful. Nice and simple filled with family, friends, drinks, music, and WONDERFUL food!

Of course I could not resist making my own birthday cake. However, I wanted  to get crazy and make something really decadent. Whats more decadent then a smooth and creamy cheesecake?! Um a white chocolate cheesecake with a homemade salted caramel sauce on top that's what!

This cheese cake is pretty amazing on its own however this sauce is literally to die for! And you only need a little bit on top of the cheesecake so you will have a ton left over to put on top of ice cream, pie, pretzels, apples, or to just eat with a spoon.

So if you have a few hours to spare I recommend spending them making this amazing concoction!
Keep checking back for all the recipes I need to get up here! :)

sorry for the lousy picture from my phone, but hey look there's Alton Brown! Haha LOVE his Good Eats Books
White Chocolate Cheesecake with Salted Caramel Sauce
Makes 1 10 inch cake
Serves 8-16
*This works best with a 10in spring form pan and a stand mixer.

Caramel Sauce
Ingredients
  • 1 1/2 cups granulated sugar
  • 1 3/4 teaspoons lemon juice
  • 1 pint heavy cream
  • 4 tablespoons unsalted butter
  • 1 1/2  teaspoons coarse sea salt
Directions
*note* This can burn easy so be careful and keep an eye on the sugar. It may be tricky but SO worth it.
  1. In a medium non stick sauce pan over medium high heat, combine the sugar and lemon juice. Stir with a wooden spoon until the sugar is mostly melted then set aside the spoon and swirl the pan over the heat to keep the color even throughout.
  2. Continue to cook and swirl until it sugar turns a medium amber color. Be cautious because the sugar can darken quickly and you do not want that. It will taste burnt.
  3. When the sauce is at the dark amber color  slowly whisk in the cream. If the caramel hardens with the addition of the cream, just continue to add the cream and bring the mixture back to a a boil over medium heat.
  4. Continue to stir until the sugar has remelted.
  5. Allow to boil for 5 minutes then remove from heat and stir in the butter.
  6. Stir in sea salt and pour into a heat safe container and chill until ready to use.
Ingredients
Crust
  • 10 ounces graham crackers, crushed into crumbs
  • 7 tablespoons unsalted butter
Cheesecake Filling
  • 3 8-ounce packages of cream cheese, room temperature
  • 1 1/4 cups granulated sugar
  • 1/2 cup heavy cream
  • 8 ounces good quality white chocolate, chopped
  • 5 large eggs
  • 1 teaspoon vanilla extract
  • pinch salt
  • boiling water
Directions
  1. Pre-heat the oven to 375°F.
  2. Combine the graham cracker crumbs with the melted butter and press into the bottom and 1 1/2 inches up the side of a 10 inch spring form pan.
  3. Bake for 10 minutes and then allow to cool completely on a wire rack.
  4. Reduce the heat to 325°F and prepare the cheesecake batter.
  5. Place the chopped white chocolate into a heat safe bowl and set aside. Then bring the heavy cream to a simmer over medium heat in a small sauce pan.
  6. Pour the hot cream over the white chocolate. Stir the chocolate gently until melted completely.
  7. Place the cream cheese in your mixer with the paddle attachment and beat the cream cheese until smooth and lump free.
  8. Add the sugar and mix, scraping down the sides of the bowl several times.
  9. On medium speed, slowly add the melted white chocolate and mix until just combined
  10. Follow with the eggs, one at a time, beating on low speed until each egg is incorporated. Then the mix in the vanilla and salt and pour into your prepared pan.
  11. Place the pan onto a couple large sheets of aluminum foil and smooth them up the sides of the pan to waterproof.
  12. Set the cheesecake into a large roasting pan and then place in the oven. Pour the boiling water into the roasting pan, filling to about one inch (no higher than the lowest edge of aluminum foil).
  13. Bake at 325°F for one hour then reduce heat and bake at 300°F for an additional 60-90 minutes until the center is just set. (Mine took just over 60 minutes)
  14. Remove from the oven and allow to cool completely on a wire rack.
  15. Once cool chill for at least 4 hours before serving.
  16. Before serving pour a small amount of the caramel sauce over the top of the cheesecake until the top is covered with a thin layer. If needed reheat the sauce slightly in the microwave for a few seconds to allow easy pouring and spreading.

Sunday, August 5, 2012

Violet, you're turning violet!

Pin It
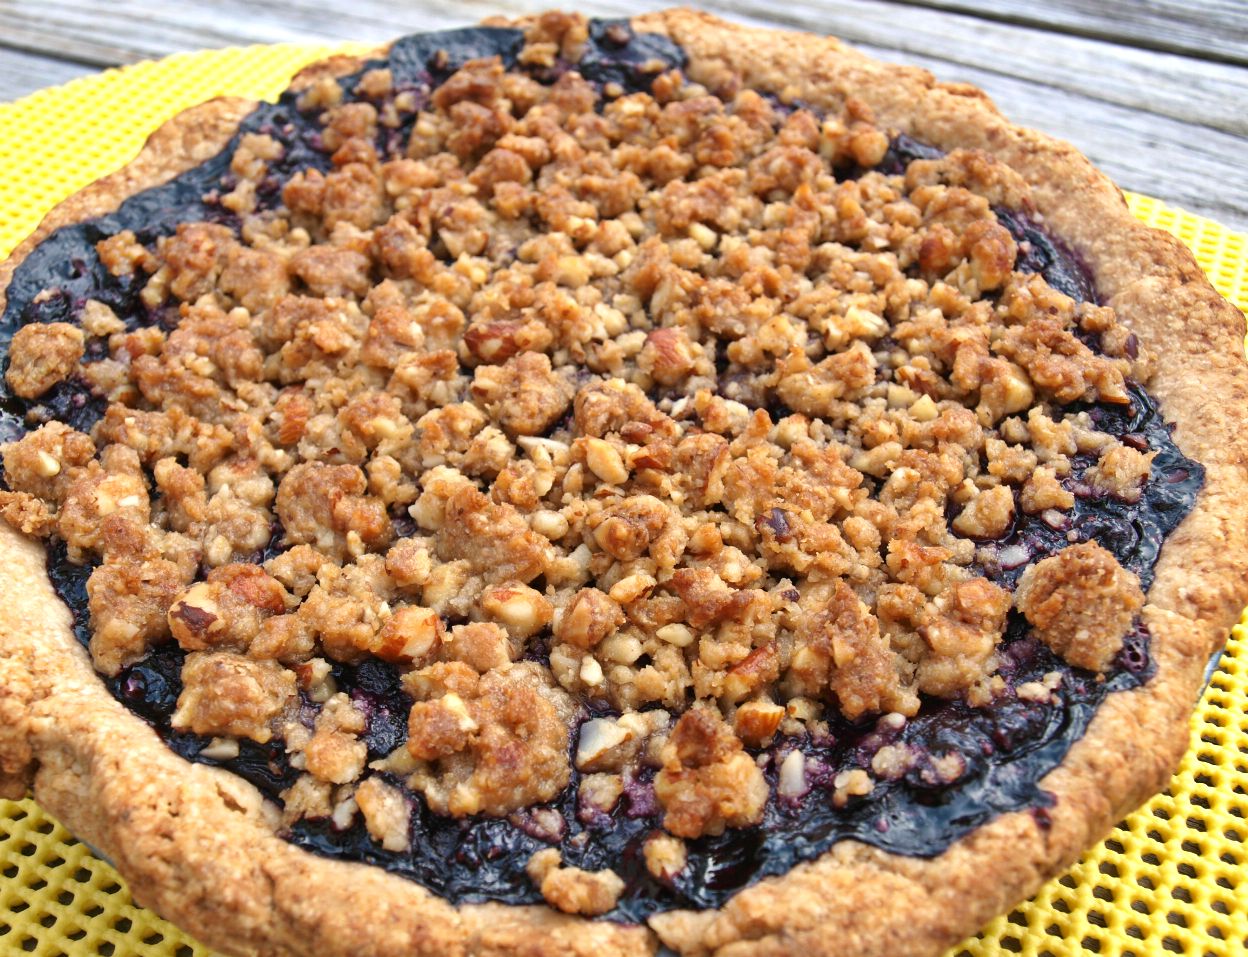
Blueberry Crumb Pie


Yes another blueberry recipe. I told ya I had more :)
Well this one is another delicious way to use up these summer berries. This recipe is a Food Network Magazine find. My roommate and I actually both bought the magazine and both saved this recipe so we knew we had to make it.
This is the perfect summer pie and will be great at any bbq or gathering. Not only is this a impressive  pie to look at but it is made from scratch (even the crust!), which makes it all the more impressive. Being that it is made from scratch, it is a little bit time consuming but well worth it!
It is a whole wheat crust which is dense and buttery, much better than a store bought pastry or pie crust. It also has an amazing brown sugar and walnut crumble topping, mmm mmm mmm!

Well it's a beautiful beach day and that ocean is calling my name so I will just leave you with the recipe and hope you try this :).

Oh btw, this pie is best eaten with in a few days (like 2) or freeze it to keep it from becoming runny and soggy.

You can find the recipe over at Food Network, which has detailed directions.

I recommend adding some cinnamon to the crust and crumble, and maybe trying honey instead of sugar in the blueberry filling. Just think it will spice things up a little :)

 Enjoy <3

In case you didn't see the link above, here is the link; Blueberry Crumb Pie

Tuesday, July 31, 2012

Sweet as Honey

Pin It


....Or what I like to call CRAZY AMAZING SUPER DELICIOUS ice cream. MMM if only there was an even better name to call this. This ice cream has got to be the best homemade, no best ice cream period, I have had in quite some time.

It has very few ingredients but is so flavorful! The blend of milk and honey are perfectly sweet. It has a silky smooth texture from being churned in the ice cream make. MMM MMM MMM. Seriously I cannot get enough. I am very impressed.

I found the recipe over at The Hungry Mouse, a new blog I found (with step by step instructions on literally everything she makes), and wanted to try it right away. I was intrigued by the use of honey instead of sugar because honey has a much deeper flavor and less intense sweetness than pure sugar. I did change a few things though.

To lighten it up, just a tad, I used half and half instead of heavy cream, and 1% milk instead of whole milk. Even with the changes it came out incredibly smooth and still creamy so I can't imagine how heavenly it must be with the full fat milk and cream.

There really isn't much else to say about this except how ridiculously great it is. So if you have an ice cream maker I HIGHLY  recommend trying this. If not, its worth buying one for lol :).

Well I have to go eat more ice cream, it's calling my name.


Enjoy!

Milk and Honey Ice Cream
Adapted from The Hungry Mouse
Makes about 1 quart
Ingredients
  • 6 egg yolks
  • 2 cups half and half
  • 1 cup 1%  milk
  • 1/4 cup honey
  • 2 Tablespoons vanilla extract

*Ice cream maker
*Candy thermometer
*Mesh strainer

Directions
  1. Separate the eggs. Placing the yolks into a large bowl. Save the whites for up to 1 day, make an omelet for breakfast with them :).
  2. Beat egg yolks well and set aside.
  3. Put the heavy cream and milk in a medium-sized, heavy-bottomed pot.
  4. Set the pot on the stove over medium heat, stirring occasionally, until it just starts to steam and bubble at the edges. Don’t let it boil.
  5. While waiting for the milk to heat up, pour the honey into a large bowl and set aside.
  6. Fill a bigger bowl with ice and set aside. This is going to be your ice bath to cool the heated mixture so you want the smaller bowl to fit inside the bowl with the ice.
  7. Place your strainer on top the bowl with the honey.
  8. Once milk mixture is heated remove from heat. Using a ladle, SLOWLY drizzle the milk mixture into the beaten egg yolks, while whisking continuously. You want to temper the eggs, bring the temperature up with out cooking them and getting scrambled eggs. So doing this slowly and whisking at the same time is important.
  9. Continue to do this until the majority of the milk mixture is whisked into the yolks. The pour yolk and milk mixture back into the pot and place back on the stove.
  10. Attach your candy thermometer to the pot but do not let it touch the bottom or you will not get an accurate reading.
  11. Heat over medium heat until mixture reaches 170, stirring occasionally.
  12. Once it reaches 170, instantly remove from heat and pour through the strainer into the bowl with honey. This will catch any cooked pieces of egg.
  13. Whisk to incorporate honey and follow with the vanilla.
  14. Pour into a container, press plastic wrap onto the top of the mixture, and let chill in the fridge for 4-6 hours, yes you need some patience.
  15. Once fully chilled and thickened, churn in ice cream machine according to that machines directions.
  16. Enjoy right away for a soft serve texture, then place in a freezer safe container and let set over night.
  17. Invite people over because you will want to eat he whole thing! 

Sunday, July 22, 2012

Pin It
Crazy Simple yet Crazy Delicious Cocoa Brownies


Hello hello! I was thinking of throwing another blueberry recipe at you but how does chocolate sound instead?

Good? Keep reading. No good? Well then go find something else to do, although I do not recommend that but the choice is yours :).

This recipe is coming to you from my roommate who is not only my partner in crime but my ever ready taste tester. She is always ready to try any and everything I come up with. So it goes with out saying that I taste whatever she makes as well.

Well I came home pretty late from babysitting and saw these brownies sitting on the stove and dove right in. MMM MMM MMM!

I was honestly surprised how great they tasted. Now, that's not because I don't trust her baking and cooking. It was mainly because they were not as dark as your typical brownie. They had a lighter brown color to them, so I was expecting a light chocolate flavor and a cake like texture.

Well don't judge a book by its cover and don't judge a brownie by its color. These were dense and fudge like with out being too heavy. And they chocolate flavor was stronger than it looked which was balanced nice by adding a little extra vanilla. Again MMM MMM MMM!

So the next morning I asked her what recipe she used. She basically looked up brownies online and took the first recipe she thought was easy enough. Literally only needs, butter, sugar, cocoa powder, eggs, vanilla and flour. You can go ahead and chocolate chips or walnuts or whatever you like in your brownies, but these cannot be easier. No melting chocolate or anything just mixing and baking.

If you are looking for a quick fix, of chocolate, get to baking and enjoy!


  • 4 large eggs
  • 1 cup sugar, sifted
  • 1 cup brown sugar, sifted
  • 8 ounces melted butter
  • 11/4 cups cocoa, sifted
  • 2 teaspoons vanilla extract
  • 1/2 cup flour, sifted
  • 1/2 teaspoon kosher salt
  • Directions
    1. Preheat the oven to 300 degrees F. Grease an 8x8 or 9x13 baking dish.
    2. In a large bowl or stand mixer fitted with a whisk attachment, beat the eggs at medium speed until fluffy and light yellow.
    3. Add both sugars.
    4. Add remaining ingredients, and mix to combine.
    5. Pour the batter into prepared dish and bake 45 minutes or until toothpick inserted in the center comes out clean.
    6. Let cool, or try to, before cutting into squares.

    Wednesday, July 18, 2012

    Ice Ice Baby

    Pin It
    Blueberry and Cream Popsicles


    Hello hello! I don't know how it is for you, but here its HOT HOT HOT! I'm pretty sure this has been the hottest summer here on the  (south) Jersey Shore in quite a long time.

    Thank goodness for the wonderful ocean always calling my name! And thank goodness for ice cream! Now I have never been an ice cream fanatic, regardless of my giant sweet tooth. However, this summer I feel like I have been eating buckets of the stuff. So I thought I need to get back to using that oh so wonderful ice cream maker my lovely friends had bought for me!

    I was going to go all gourmet and make a salted caramel ice cream, but when I opened my refrigerator I changed my mind. I saw my left over blueberry sauce from those amazing blueberry cheesecake cupcakes I made recently. So I thought hmmm I can defiantly make a super simple blueberry ice cream. 

    Then I got to thinking even more. Do I really need to have a gallon of ice cream sitting in my freezer for me to devour?
    Need, no. Want, yes.

    So to save my butt from growing I decided to make Popsicles instead. Such a thinker, aren't I?

    These turned out perfect, and seriously could no be easier. Even if you don't have left over blueberry sauce, that only take minutes to make.

    Once the sauce is made you simple make a separate cream base of heavy whipping cream, half and half, sugar and vanilla. Viola!

    Easy as that! This recipe can make up to 6 pops but feel free to adjust it to make more because you won't want just one :).

    Enjoy & stay cool!

    Blueberry Cream Pop's
    makes 4-6 popsicles

    Ingredients
    • 1 cup blueberry sauce, recipe found here
    • 3/4 cup heavy cream
    • 1/4 cup half and half (or more heavy cream)
    • 1/2-1 cup powdered sugar (adjust to your sweetness level)
    • 1/4 teaspoon vanilla extract
    *A popsicle kit is great but you can use small paper cups and popsicle sticks as well*

    Directions
    1. In a large bowl, whisk together cream, half and half, vanilla, and sugar until sugar is dissolved.
    2. Spoon some of the cream mixture into each of the popsicle containers, or cups, filling just the bottom.
    3. Spoon some of the blueberry sauce on top of cream mixture.
    4. Continue to do this until popsicle container is filled and top with popsicle top/stick.
    5. If using paper cups let the pop's freeze slightly before inserting popsicle stick.
    6. Let freeze for 6-8 hours before enjoying.


    Sunday, July 15, 2012

    Blueberry Cheesecake Cupcakes

    Pin It

    Hello Strangers! Yet again I have let this lovely place lack in new posts. But I am coming back with not just a great recipe but an AMAZING new cupcake!

    These pretty little things are Blueberry Cheesecake Cupcakes. Sounds phenomenal right?

    
    They look phenomenal too, don't they?!
    
    They are light and airy vanilla cupcakes filled with a blueberry sauce that is made with honey instead of sugar, and topped with a cream cheese  frosting. A great summer cupcake, especially here in South Jersey where blueberries are as fresh as you can get!

    I also got fancy and used colored icing swirled with white icing. I think this is my new favorite way of frosting cupcakes. I could look at them all day they just look so great!
    To make the swirl is actually very simple. A great tutorial can be found HERE. It is also quite a great blog as well. If you haven't checked it out yet, you should.

    I filled the cupcakes by using a small pairing knife to cut a circle into the top of the cupcake. Then I pulled the piece out and gently pressed down on the hole to make a little but more room for the filling. Next I spooned the cooled blueberry filling into the hole and topped with the piece I removed. Its very simple but if you want more detailed directions at Annie Eats, another blog I love following.


    I wish I had a good picture of the middle of the cupcake but I only have a blurry one taken from my cell but I will show you just to give you an idea of what the blueberry filling looked like. But I will post it at the bottom away from the prettier pictures, lol.

    Anyways, stop reading and go make these delectable cupcakes!

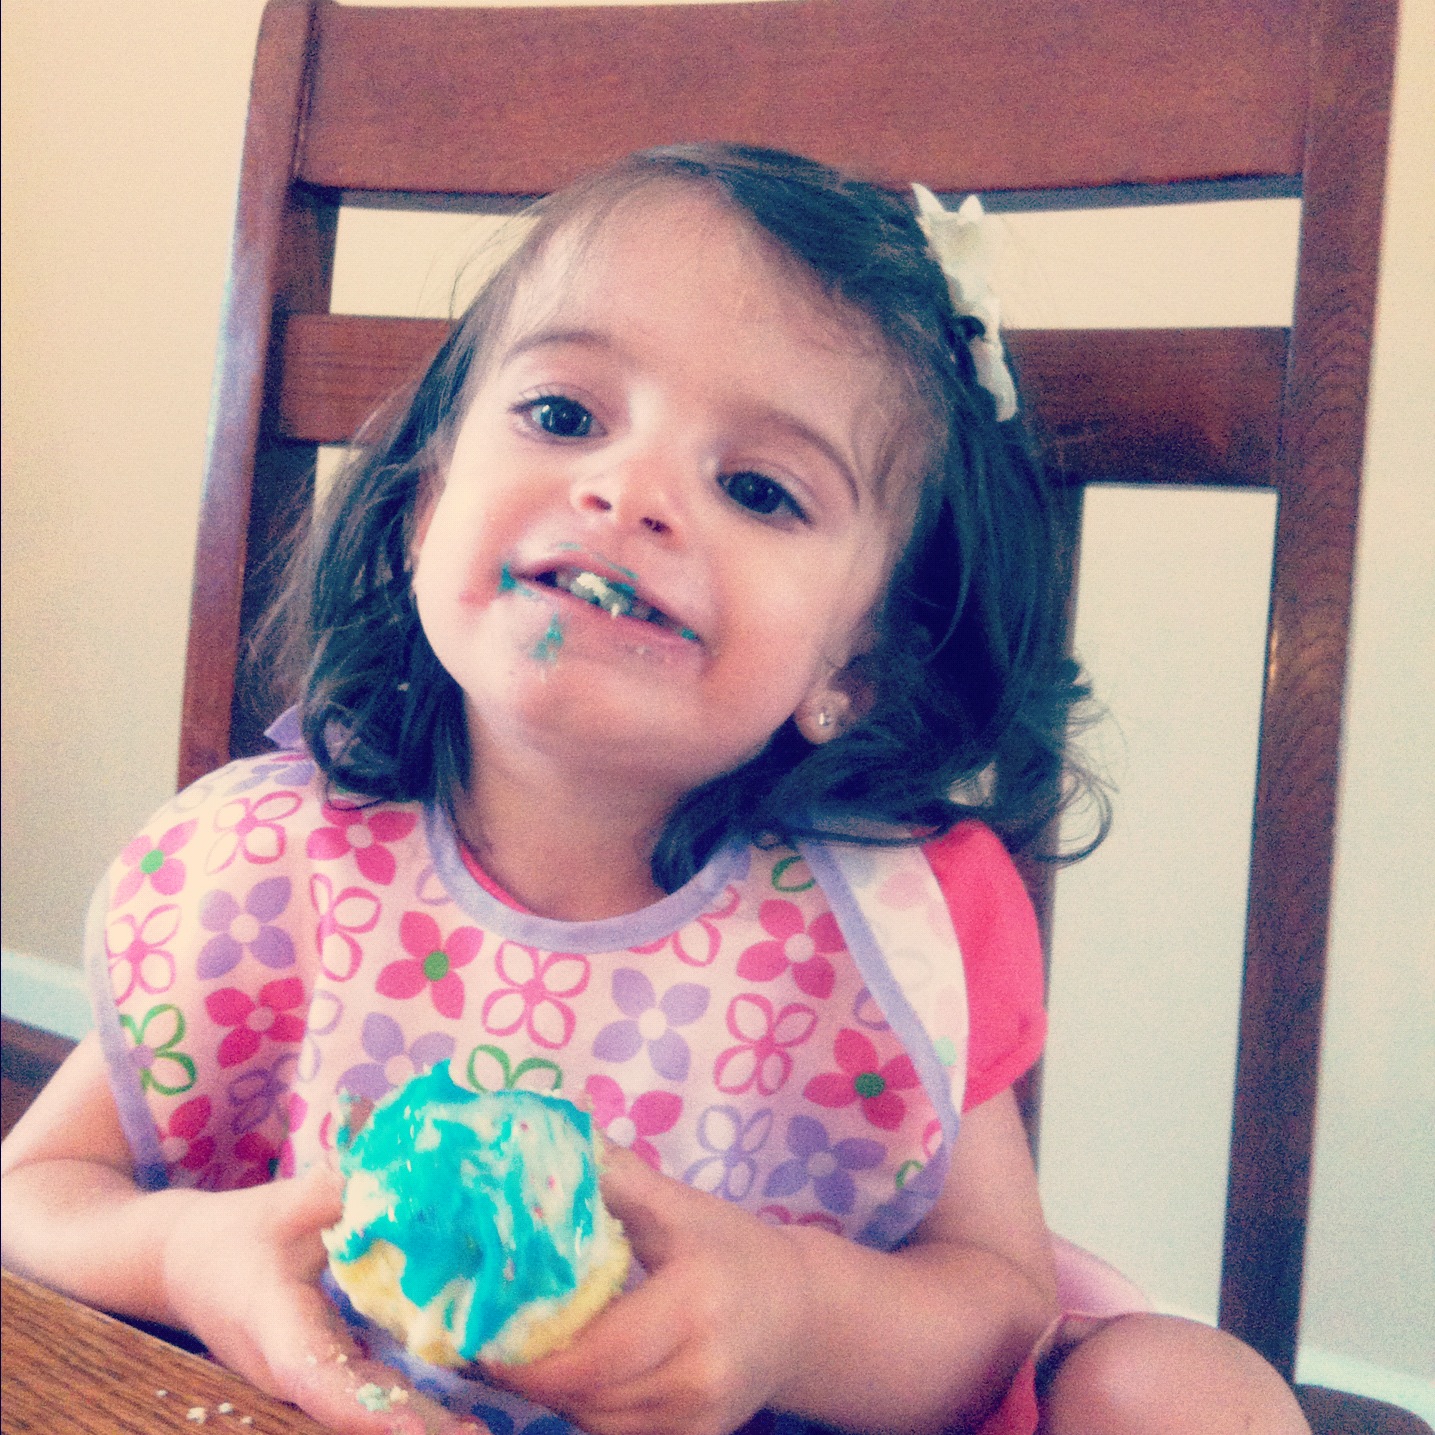
    my niece loves her cupcakes!
    Blueberry Cheesecake Cupcakes
    makes 12 cupcakes

    Vanilla Cupcakes
    Ingredients
    • 1/2 cup unsalted butter 
    • 1 egg
    • 2 egg yolks
    • 1 1/2 cups all purpose flour
    • 1 1/2 teaspoons baking powder
    • 1/4 teaspoon salt
    • 3/4 cup sugar
    • 1 teaspoon good quality vanilla extract
    • 1/2 cup whipping cream
    Directions
    • Preheat oven to 350 and place 12 cupcake liners in muffin tin.
    • Sift together flour, baking powder, and salt into a large bowl and set aside.
    • Beat butter with an electric mixer for 30 seconds. Add in sugar and beat until combined.
    • Add egg, and egg yolks one at a time until fully incorporated.
    • Add vanilla.
    • Add 1/3 of the flour mixture and beat until  just combined. Follow with half of the whipping cream. Repeat, and end with the last 1/3 of the flour mixture, beating until just combined.
    • Pour evenly (usually about 1/4 cup) into the muffin tin and back 15-18 minutes, until top is slightly golden and toothpick comes out clean.
    • Cool in tin for 5 minutes, then remove and let cool completely on a cooling rack.
    Blueberry Filling
    I used my go to blueberry sauce recipe used for these oatmeal bars and this frozen yogurt cake, mmm!
    • 1 2/3 cups blueberries
    • 3 tablespoons honey, or sugar but I prefer honey
    • 2 teaspoons cornstarch
    • A pinch of nutmeg
    • 1/4 teaspoon cinnamon
    • 2-3 teaspoons lemon juice 
    Directions
    1. Add all ingredients to a medium saucepan and bring to a boil.
    2. Reduce heat and stir constantly until sauce thickens, about 5-7 minutes.
    3. Remove from heat and set aside.
    *there will be plenty left over; perfect for ice cream or waffles*

    Cream Cheese Frosting
    *this makes quite a lot as well, but it's always great to have extra icing :)
    Ingredients
    1 8 oz package of cold cream cheese (not rock solid, but right out of the fridge is perfect)
    5 tablespoons of room temperature butter
    2 teaspoons vanilla extract
    2 cups powdered sugar
    *Blue food coloring for half of icing mixture

    Directions
    1. Sift 2 cups of powdered sugar into a large bowl and set aside.
    2. Beat cold cream cheese with butter and vanilla until combined, do not over mix or it will loosen and separate.
    3. Gradually add sifted sugar and beat until just combined. Add more until you reach the consistency and sweetness level you prefer.
    4. Scoop half of the frosting into a separate bowl and add enough blue food coloring until the color you want is achieved.
    5. Spoon the white frosting in a piping bag and the blue into another.
    6. Cut the ends and place into a larger pipping bag fitted with the tip of your choice. Make sure both ends are inserted into the tip or you will only get one color to come out.
    To Assemble Cupcakes
    1. Once cupcakes and filling have cooled, use a pairing knife to cut holes in the top of the cupcake.
    2. Trim the bottom off the piece you just removed from the cupcake, leaving just the flat top
    3. Spoon blueberry filling into the hole and replace the top of the cupcake.
    4. Pipe frosting onto cupcake in a large circular motion.
    *Again refer to these two sites for excellent step by step directions:

    <3ENJOY
     
     P.S. Here's a look at the filling


    Friday, June 1, 2012

    When Life Gives You Lemons...

    Pin It
    Honey Lemon Loaf Cake
    with lemon glaze

    Hello hello! How did everyone enjoy their Memorial Day weekend?! Hopefully it was filled with good company, good weather, and of course good food! I made this cake this week and though it was just the perfect summer cake and would have been perfect for a Memorial Day BBQ.

    I  don't know about you but I am a HUGE fan of anything lemon. It surprises me how many people do not like lemon. I could eat gallons of lemon water ice, a ton of lemon bars, lemon cookies, lemon chicken, and slurp glass after glass of lemonade. So for me this cake is absolutely perfect! And for those of you who aren't too thrilled about anything lemon I recommend trying this cake. It's not a super strong lemon flavor. 
    This cake is super light with a sweet yet slightly tart flavor.


    Honey Lemon Cake

    Ingredients
    • 1 1/2 cup flour
    • 1 tsp baking powder
    • 1 tsp salt
    • 1/2 cup honey
    • 1/2 cup granulated sugar
    • 1/2 cup unsalted butter, room temperature
    • 2 eggs
    • 1/2 cup milk
    • Zest of 1 full lemon
    For the Glaze
    • Juice of 1 full lemon
    • 1 tbsp honey
    • 1/4 cup powdered sugar
    Directions

    1. Preheat the oven to 350 degrees.
    2. Spray a 9in loaf pan and line it with parchment paper, letting it hang over the edges. This will make it easier to remove from the pan. 
    3. In a small bowl combine the flour, baking powder and salt.
    4. In a large bowl with an electric mixer beat together the honey, sugar, butter and eggs.
    5. Add the milk and lemon zest then mix further.
    6. Add the flour mixture and blend it until it's just combined.
    7. Pour it into the prepared loaf pan and smooth the top with a spatula.
    8. Bake it for 30 – 40 minutes or until a toothpick inserted into the middle comes out clean and the top is a golden brown. It will bake much quicker on the top and edges and look finished but check the middle with a toothpick to be sure. 

    To Make the Glaze
    1. In a small bowl whisk together the reserved lemon juice, honey and powdered sugar.
    2. With a spoon drizzle the glaze over top of the warm cake and let it soak in for 10 – 15 minutes.

    Using the parchment paper overhang lift the cake out of the pan and let it cool completely on a cooling rack before slicing it. Enjoy!

    Thursday, May 24, 2012

    Blueberry Oatmeal Bars

    Pin It


    Look at me, back in action and keeping up with my blog posting! Well now that I have somewhat of a schedule and a working computer be prepared for some OUT OF THIS WORLD recipes. Haha not really, but still quite tasty and down right Pinterest worthy right?!

    This recipe is one I came up with yesterday morning. I had bought some blueberries and they were extremely plain and almost flavorless. I get it, its a tad too early for blueberries, but I could eat buckets of blueberries so whenever they are sold I can't resist and buy them knowing they are not going to be nearly as delicious and ripe as they should be. If I just wait a few more weeks I can have an endless selection of blueberries at my finger tips, being that I literally live in the blueberry capital of the world.


    However, I bought the pint of blueberries. Since I did not want to eat them plain I figured I'd bake something with them. I decided to go with a good old blueberry bar. Its nice and sweet thanks to making a sauce with the blueberries and honey, but also toasty and crunch because of the oatmeal and walnuts.

    Mmm mmm. I could eat the whole batch, but I won't. At least I hope I won't.

    If you went out and bought blueberries a bit too early don't eat them its not worth it. Make these bars, they are well worth it!

    Blueberry Oatmeal Bars
    Makes 12-16 bars

    Ingredients

    For the bars
    • 1 1/2 cups quick cooking oats
    • 1/2 cup whole wheat flour
    • 1/2 cup brown sugar, dark or light
    • 1/4 teaspoon baking soda
    • 1/4 teaspoon salt
    • 1/2 a teaspoon cinnamon
    • 6 tablespoons unsalted butter, melted
    • 1/4 cup chopped walnuts
    For the Filling
    • 1 2/3 cups blueberries
    • 3 tablespoons honey, or sugar but I prefer honey
    • 2 teaspoons cornstarch
    • A pinch of nutmeg
    • 1/4 teaspoon cinnamon
    • 2-3 teaspoons lemon juice 
    Directions
    1. Preheat oven to 350 degrees.
    2. Line an 8 in square baking dish with parchment paper, or foil with non stick spray.
    3. In a large bowl, mix the oats, flour, brown sugar, baking soda, salt, and cinnamon together.
    4. Add the melted butter and mix with a fork until combined and a light crumb forms.
    5. Press half of the mixture into the prepared dish and bake for 12 minutes.
    6. While baking the crust; Prepare filling by adding the blueberries, honey, cornstarch, nutmeg, cinnamon and lemon juice to a medium sauce pan.
    7. Stir ingredients and continue to cook over medium heat until sauce thickens, about 7 minutes.
    8. Pour over crust and top with remaining mixture.
    9. Sprinkle the 1/4 cup of nuts over the top, and bake for about 30 minutes.
    10. Let cook in pan on a wire cooling rack.
    11. Once cool cut into bars and enjoy!

    Tuesday, April 3, 2012

    A Tropical Twist on Cupcakes

    Pin It
    Coconut Mango Cupcakes
    coconut cupcake with a mango filling and mango frosting


    Hello Hello! So, I'm pretty sure I made the WORLD'S BEST  CUPCAKE......EVER!

    Haha, most likely not. But for the time being I am pretty much crazy about this cupcake. I had a request for a mango cupcake. They didn't care what else as long as there was mango in it. I got to pondering and it took me a few days and some research but I came up with this recipe the day these cupcakes were needed.

    I didn't want to do just a white or vanilla cake with a mango frosting, I  wanted something more complex. I also knew I didn't want the cupcake itself to be mango.  So I did some research on mango cupcake recipes and found quite a bit of coconut and mango in many varieties and was instantly sold. Mango and coconut, the perfect tropical combination.

    I decided on a coconut base with a mango curd fillings and fresh mango frosting. That way the coconut was not over powering the mango flavor, instead just blended sweetly.

    I kept debating on how to  make the cupcake. Do I use shredded coconut? Coconut milk? Both? Well I went with the shredded coconut, which was folded into the batter at the end. The cake it self had a great flavor however I am not a huge fan of all the shredded coconut and want to experiment using coconut milk to see what kind of flavor and texture I get with that. Regardless these came out phenomenal!

    I highly recommend making these. Not only are they crazy delicious, but everyone will be so impressed by your cupcaking skills!  Just a warning, these do take some time. You need to puree the mango for both the filling and frosting. The filling also needs to be cooked and chilled for at least 2 hours, so be prepared for some extra steps.

    If you feel like tackling these babies they will make perfect Easter treats this weekend :)!


    Cupcakes
    Makes 12-15
    • 3/4 cups (1.5 sticks) unsalted butter, room temperature
    • 1 cup sugar
    • 3 large eggs at room temperature
    • 1 1/2 teaspoons pure vanilla extract
    • 1 1/2 cups flour
    • 1/2 teaspoon baking powder
    • 1/4 teaspoon baking soda
    • 1/4 teaspoon kosher salt
    • 1/2 cup buttermilk
    • 3.5 ounces sweetened, shredded coconut
    Mango Curd (this makes A LOT, I used the left over to make ice cream)
    • 3/4 cup sugar
    • 1/4 cup cornstarch
    • 1 cup fresh mango puree
    • 4 egg yolks
    • 1 stick unsalted butter, cut into tablespoons
    Frosting:
      • 1 (8 oz.) pkg. cream cheese, room temperature
      • 1 1/2 sticks butter, room temperature
      • 1/4 c. mango puree
      • 1 tsp. vanilla extract
      • 3-4 c. powdered sugar
      To make the filling
      1. In a large saucepan, whisk together the cornstarch and sugar.
      2. Add the mango puree, followed by the egg yolks.
      3. Continure to cook over medium heat until the mixture thickens (6-7 minutes), stirring constantly.
      4. Remove from heat and whisk in the butter one tablespoon at a time.
      5. Pour the mixture into a bowl and top with plastic wrap, pressing the plastic wrap into the top of the filling.
      6. Chill in the fridge for 2 hours.

      To make the cupcakes

      1. Prehead the oven to 325 degrees and line muffin tin with cupcake liners.
      2. In a large bowl cream together the butter and sugar until light and fluffy, about 5 minutes.
      3. Add the eggs, one at a time, scrapping down the sides of the bowl as you go.
      4. Add the vanilla and mix until combined. 
      5. In a seperate bowl, sift together the flour, baking powder, baking soda, and salt.
      6. In three parts, alternately add the dry ingredients and the buttermilk, begining and ending with the dry ingedients.
      7. Mix just until combined, and fold in the coconut.
      8. Fill each liner 2/3 full and bake 25-30 minutes, until the tops a re lightly browned and toothpick comes out clean.
      9. Cool in pans for 10-15 minutes then remove to cool completely on a cooling rack.
      To Make The Frosting
      1. In a large bowl combin cream cheese and butter until combined.
      2. Add in the mango puree and vanilla extract and beat until fully incorporated.
      3. Add powdered sugar gradually until it is as sweet and thick as you prefer.
       To Assemble the Cupcakes:
      1. When cupcakes have cooled, cut a cone out of the top using a paring knife. 
      2. Spoon the mango filling into the cupcake until just reaching the top.
      3. Remove the bottom of the cone you cut out of the cupcake, placing just the top back on the cupcake where you filled with the mango filling.
      4. Frost cupcakes how prefer.
      5. If wanted toast the left over coconut and sprinkle on top. 

      Enjoy! 
      And try to save some to share before you eat them all :) 
      pop art cupcakes :)